Friday 30 November 2012

Getting ready for B2

One of the best things about expecting is the fun of planning and doing up a new room for your little arrival.

B2 is a mystery baby so I have been looking for ideas that are gender neutral but still fun. I will be spending a whole lota time in there once buba has arrived so I think its important that it's a space thats comfortable and enjoyable for mama too.

There are so many great blogs out there with creative ideas for inspiring a gorgeous nursery, I am loving Chic Cheap nursery at the moment. With all the expenses of our impending renovation you had me at cheap ;)

Here is my current ideas board

1. Riley Blake Med Chevron in Aqua -Hawthorne Threads
2. Riley Blake Small dots in Yellow -Hawthorne Threads
3. Michael Miller Bunting -Hawthorne Threads
4. Expedit shelving unit -Ikea
5. Room inspiration -Chic cheap nursery
6. Circus train reusable fabric wall decal -Pop & Lolli
7. Strandmon wingchair - Ikea

I have a wooden window pelmet all ugly and plain and just hanging out to be covered in that gorgeous Riley Blake aqua chevron. If I can convince Granny domestic too say yes, she has a beautiful old red wingback chair she had shipped out from Scotland that will save us getting the Ikea one.

Our one big expense in this room will really be the wall decal from Pop & Lolli but I think for the quality and impact it will have on the room it will be well worth it.

We will be doing a lot of recycling this time around as Little B is not so little she will be donating her cot and change table to her new baby bro or sis. That means a new room for Little B with a big girl bed Yay

I'm not sure how it came about but little B is currently confused between beds and beards (Mr Domestic was growing one to accompany his mo for Mo-vember). I guess they do sound similar to say but I will admit I was a bit crushed when I asked her "would you like to go look at big girl beds today baby?" her reply, "Beard?" while rubbing my chin... oh dear :/

**I can honestly say there is not a trace of a beard on my chin FYI.

Make sure to stay tunned to check on my progress.

xo

Saturday 24 November 2012

DIY maternity shorts


It's coming into summer in Perth and its getting hot, really hot. Being pregnant at this time of year really is a terrible idea. I think it's about time I get into my $12 maternity shorts and enjoy the sunshine!

Yup I said $12 maternity shorts, if you are going to recycle an old pair or get some from the op shop yours will probably cost less.

Here are mine


and this is a well known maternity brands RRP $89.95


For the hour it took me to make my version, I think the $78 was well saved don’t you agree?

Haven't sewn with stretch knits before? Don't be scared it's easier than you think there is heaps of great info on the net about how to do it, I love DIY maternity's guide for knit sewing as I think it covers all the basics you need to get started

To make your own pair you will need

  • Pair of shorts either buy a cheapy pair or recycle some you already have.
  • 1 piece of stretch knit 20 inch x the diameter of your shorts minus 1 inch - You could recycle an old stretchy t-shirt here but I like something sturdier so used a cotton lycra blend I bought from the fabric shop.

First off you need to remove the zipper as you won’t be needing this (plus your sewing machine needle wont like sewing over a metal zipper!) using a seam ripper. Try to keep from unpicking the decorative fly stitching so they still keep the look of a pair of denim shorts.

Unpick the belt loops at the back too as you won’t need these!

Try your shorts on to work out how low you need to cut the centre point so they are comfortable. This will depend on how you tend to carry and how high a rise your shorts have! Mark the point on the fly with a pin or marker.

Draw with a marker a faint curved line from the low point you marked on the fly to the base of the waistband.

Cut along this line and follow along the bottom edge of your waistband at the back.

Baste the pocket lining edge back onto the denim so it doesn’t slip when you sew on the knit band (see here I have pinned the pocket in place)


Sew your fly closed too using a matching colour thread


Cut a 20inch x the diameter of the shorts new waistband (minus 1 inch) rectangle of stretchy knit fabric. Fold in 1/2 with the short ends together and sew your seam to make a band.

Fold in 1/2 again with the raw edges together and seams facing inside so you end up with a 10 inch wide band.

Mark out 1/4 points with pins


Place raw edges of the knit band to raw edges of shorts with the shorts on the inside of the tube


Pin the tube to your shorts by lining up the 1/4 marks first with the front back and side seams of your shorts. You may need to stretch the tube a little in-between these marks to get it to fit nicely.

Zigzag or overlock the seams together.

Get out in the sunshine in your new shorts!

Notes: Do yourself a big favour and use the right needle for the job

- Ballpoint for stretch knits

- Heavy duty denim needle for denim

Just think about it, you wouldn’t try eating soup with a fork would you?!

Thursday 22 November 2012

Summer Berry Pavlova


As summer comes around again, this is one classic Aussie desert you cannot go past for family BBQs and celebrations. This is a pretty simple recipe that doesn't require a lot of different ingredients so it's worth giving a go.

If you have never tried one before, buddy you are missing out!

I've made this big so none of your guests have to miss out but you could 1/2 the recipe for a more modest creation.


Serves 12-16 people

12 egg whites (leave eggs out beforehand so they get to room temp for the fluffiest result)

3 cups of caster sugar

4 tsp of white vinegar

2 Tbs of corn flour

600ml whipping cream

2tsp vanilla essence

4 Tbs icing sugar

Mixed berries or a selection of soft fruits of your choice to serve

Pre heat your oven to 120°C

Trace a 25cm circle onto some baking paper, flip it over and line your oven tray with it.

Use an electric mixer to whisk the egg whites to soft white peaks (make sure your bowl and mixing attachment is super clean and dry before adding the egg whites!!)

With the beaters still running start adding in the sugar a tablespoon at a time, making sure to catch any crystals on the sides of the bowl and scrape them down. Keep beating until you have a thick glossy white mixture with stiff peaks.

Check that the sugar has been fully dissolved into the egg white by rubbing some of the mixture between your fingers; if it feels grainy turn the beaters back on for a few minutes until it feels smooth. If you go ahead and plop it on the tray all grainy it will get all weepy in the oven.

Fold through the corn flour and vinegar gently until its fully incorporated.

Using your traced circle as a guide, use a spatula to shape into a 25cm round. Bake for 2- 2 1/2 hours or until dry to the touch. Turn off oven and leave, with the door ajar, to cool completely. I like to make the pav the night before and leave it in the oven overnight to cool.

Don't worry too much if your Pavlova drops or cracks a bit (mine always do) we can always cover it in cream later!

When you are ready to serve, whip up the cream with vanilla and icing sugar and blob it on top, you can use it to fill in any shoddy cracks to :p and top with your fruit to serve.

Enjoy your delicious gooey marshmallowy creation xo

Sunday 18 November 2012

White chocolate and nectarine tart


It's no secret that I am a lover of deserts,

I love making them, looking for new recipes to try and of course eating them! Mr Domestic likes to tell people that I look at the desert menu first when we go out to dinner, if there is something that catches my eye I always order a small dinner so I have room. This is true so I won't deny it.

Looking through a Home Beautiful Magazine I have the other day this tasty little number definitely caught my eye. As we are having a BBQ on Sunday to celebrate Grandpa P's birthday it only seemed right I should test it out.

How tasty does this baby look!

Nectarine and chocolate


Base

200g malt biscuits

100g unsalted butter, melted


Filling

300ml Thickened cream

180g white chocolate

½ cup caster sugar

1 tsp vanilla essence

125g cream cheese

3tsp powdered gelatine


Syrup

3-4 ripe nectarines

¼ cup apricot jam

¼ cup sugar

1 cup water


1.      To make the base, process the biscuits to a fine crumb and then add in your melted butter so it's the consistency of wet sand. Using a flat based glass press the crumb mixture onto the base of a 22cm round spring form and take it about 2cm up the sides. * I doubted the recipe quantities so ended up with a smaller 2cm tin hence the higher sides but I would say in hindsight these quantities are spot on
Refrigerate the base while you make the filling.

2.      Melt the chocolate carefully so it's nice and smooth. You can try the traditional way in a glass bowl over simmering water, I find the microwave in short bursts quicker and easier. Set it aside to cool.

3.      Sprinkle your powdered gelatine over 1/3 cup of boiled water and mix to dissolve, leave this to the side to cool.

4.      In a separate bowl beat your cream cheese sugar and vanilla until pale creamy and smooth. Add in the cream and beat until combined and just starting to thicken.

5.      Add in the white chocolate and cooled gelatine mixture and beat again until just combined.

6.      Fill the biscuit base with your filling and place in the fridge to set for a few hours. I've made mine a day ahead so it's been chilling over night. ** don't forget to lick the bowl, the filling is delicious!

7.      To make the syrup, combine the sugar, jam and water in a small saucepan over a med heat and stir to dissolve. Continue heating to a simmer and leave it alone for 8-10 mins until its thickened. (don’t worry if it still looks a bit runny as it will thicken further on standing).


Cut the nectarines into thin slices and arrange on top of the tart and drizzle on the syrup just before serving.


** I would like to make an addendum to this recipe to note that everyone seemed to think that it was a cheesecake despite my insistence that it is a tart. It definitely has a cheesecakishness about it but is very very subtle and very delicious.


Half job Harry


Mr Domestic Darling has a really annoying name for me, Half job Harry...

To be fair, this is probably not completely unfounded but it still drives me crazy. I like to think of it as my amazing creative mind just goes into overdrive and then gets burnt out quickly. Really that makes me more like fireworks or a spectacular flower that blooms for only one day and dies right?......

Right???......

Ok let's look at a few of my latest half jobs, hopefully that will give me a kick start again to finish them off.

The doll I started making six months ago for my gorgeous niece.... Sorry about that one love

Kinda creepy all eyeless and naked don't you think? At least she's done her hair!

The cute wooden chair, I have amazing plans of sanding back and painting a bright funky colour to sit in our hallway. Right now it's good at keeping the ants away from Deadly dog’s food...


See the good bit where I have started sanding?

You know what? I'm feeling inspired already!

The for good measure ;)

Black maternity dress I am making to hopefully wear and look hot and all pregnant in when I go on dates with Mr Domestic. I swear this one will be finished soon I might even throw in a tute on modifying a t-shirt to dress tute in the coming weeks ;)

Apologies for the horrid photo here, I swear this dress looks much better on.


The metal railing on our front veranda, wait I'm not counting that one as we got someone in to finish the job but I totally helped by painting on an excellent undercoat.

Really I’m just skimming over the jobs I have started and not ever finished. If I were to get Mr Domestic to write the list it would definitely be a whole lot longer and much more brutal. Lucky for me I’m pretty sure he doesn't read this.

I am fairly certain I am not alone here with piles of half jobs, how many do you have?


Monday 12 November 2012

Minky baby blanket with self binding

A few days ago one of the lovely mamas in my mothers group had her second baby yay! If I wasn't already expecting my own I would be feeling very very clucky.

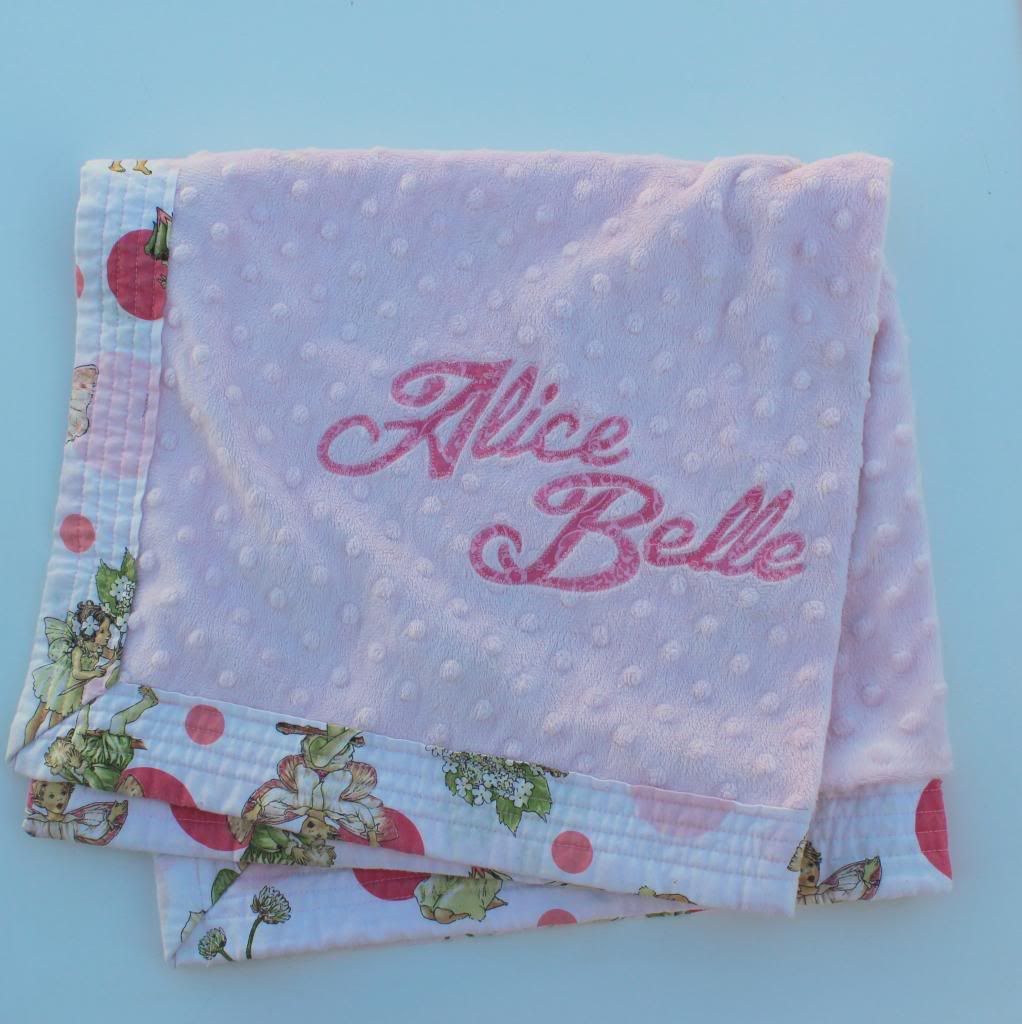
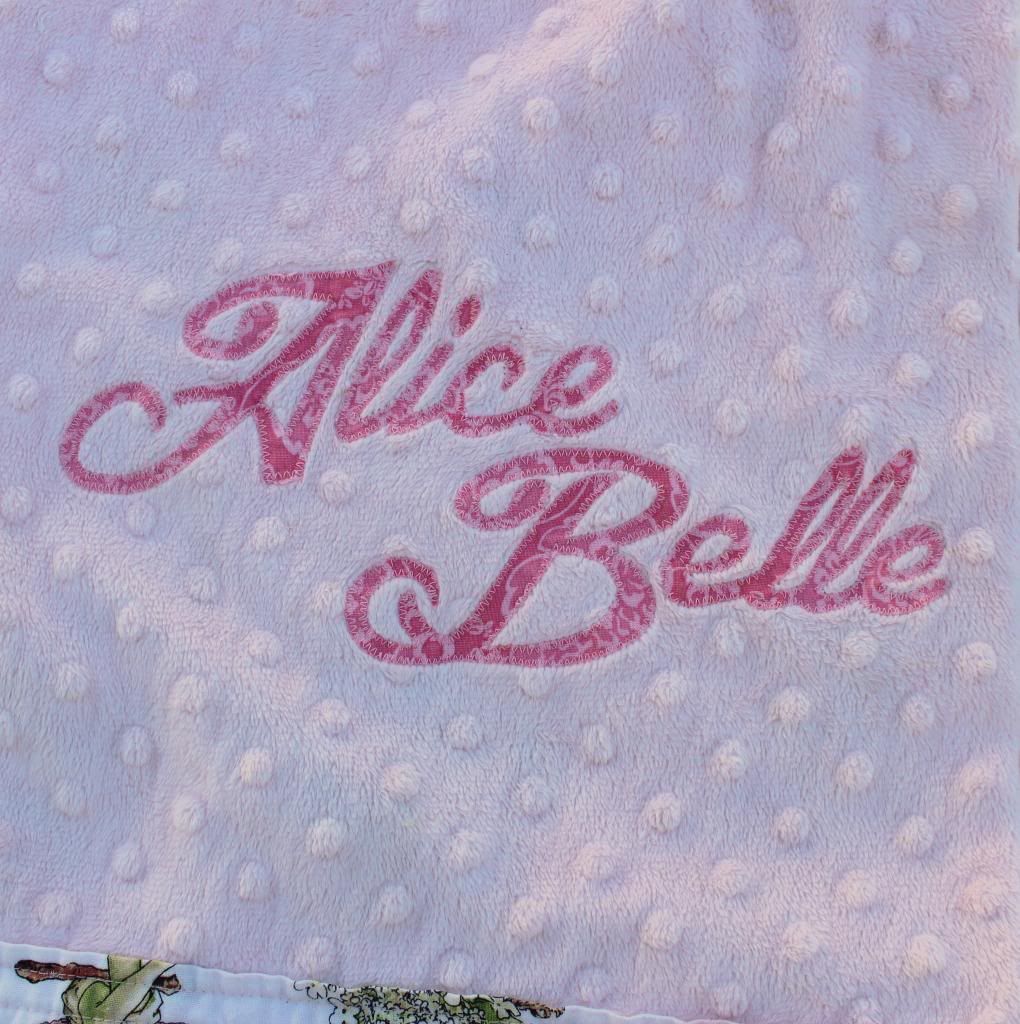
I wanted to do something special for this little one so I have made minky a self bound baby blanket, and just to be extra fancy appliquéd her name on. There a few tutorial versions of this blanket floating around the net right now but I'm biased and like mine the best as I think the binding finishes it off much nicer plus I should mention its super easy!

Doesn't it look cute?

self binding minky blanket, tutorial


You will need
1 - 80cm x 60cm rectangle of minky of your choice
1 - 90cm x 70cm quilters cotton (I like to start with a bigger piece and cut it down to size once you have the minky ready.)
Coordinating thread
Hand sewing needle
Pins

Optional if you want to add an appliqué 
Coordinating cotton scraps (big enough to get all your name letters on)
Heat and bond
Tear away stabilizer (lightweight interfacing works just fine too)
Printer

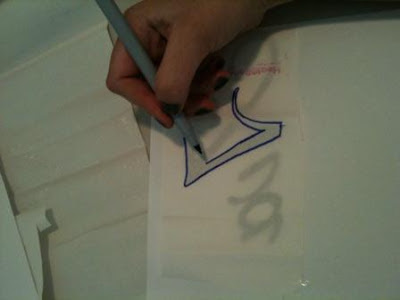
First things first, decide on a font you like that's nice and chunky (and easy to appliqué around) to type out the name. You can either pick one you like from word or just use google to find a free one you are happy with. Type it up in word and do a quick copy and paste job into paint to flip it to a mirror image. Enlarge it to the size you want and print that sucker onto a sheet of paper. You could do all kinds of things to reverse it but I'm lazy and this is the easiest way I know how.

self binding minky blanket, tutorial


Once it's printed you want to place the reversed image right side up and the heat and bond on top (glue side down btw) to trace the text. Then using your scissors cut it out all nice and neat like this..
(Don't make the rookie mistake I have in the past by using your big old fabric scissors use the nice little ones that make fiddly bits easier to work around!)

self binding minky blanket, tutorial


Peel of the backing paper, position your transfers and iron it on following the heat and bond directions.  Pin some interfacing on the back of your minky behind the transfer. The interfacing just helps to stop the minky slipping around all over the shop and driving you crazy.

Yay it's looking cute already!

Do yourself a favour and before you go all appliqué crazy, work out the ideal settings, tension, width etc on a couple of scrap pieces first. My machine is on regular zigzag 3 for tension, 3 for width and in between 0-1 for length but it may be different on your machine. You really want a nice neat zigzag that's nice and tight like this. I would really recommend using an open toe foot too if you have it as it will make the job easier, don't worry if you don't, you will just need to be extra careful.

Now let's get sewing

Starting halfway along a nice easy straight bit position your needle so the centre line lines up with the outside of your appliqué fabric. You are going to try to keep it lined up like this the whole way. Go slow, lift your foot and turn as  necessary and whatever you do avoid the temptation to pull and stretch the appliqué into the right spot, just keep lifting that foot and moving it gently. Once you get back to the start run a few stitches over and back to keep it in place.


Once you have done the appliqué, we can finally get onto putting it all together.

Place your cotton down first wrong side facing up and lay your minky right side facing up on top. You want to spend a bit of time here smoothing it all out so it's nice and neat. Using a ruler, manipulate the minky so it's got a 5cm cotton border on all sides. I like to cut my cotton now rather than earlier just to make the job easier. Oh and make sure you are pinning as you go to keep it all in place.


Press one side in half which will take you to the edge of your minky


Press again to take it 2.5 cm over the minky edge and fold the corner like this.


Now we are going to do the next side the same way, folding over once, pressing then folding again. Look how nice those corners are! Pin the corners and binding in place as you go so it stays put for sewing.


When you get to the last side, fold over the first side corner first before pressing, then we are all ready to sew.

There are a few ways you can finish off, if your happy to hand sew you could use a ladder stitch to secure the binding, if not you can just machine sew it. I'm going to machine sew mine as its nice and quick and will still look good.


You will need to do a teeny bit of handsewing to finish up. See these bits? You need to do a ladder stitch to secure them down.


If you are unsure about how to ladder stitch, there are heaps of good YouTube tutorials that can show you how (trust me it is not hard!)


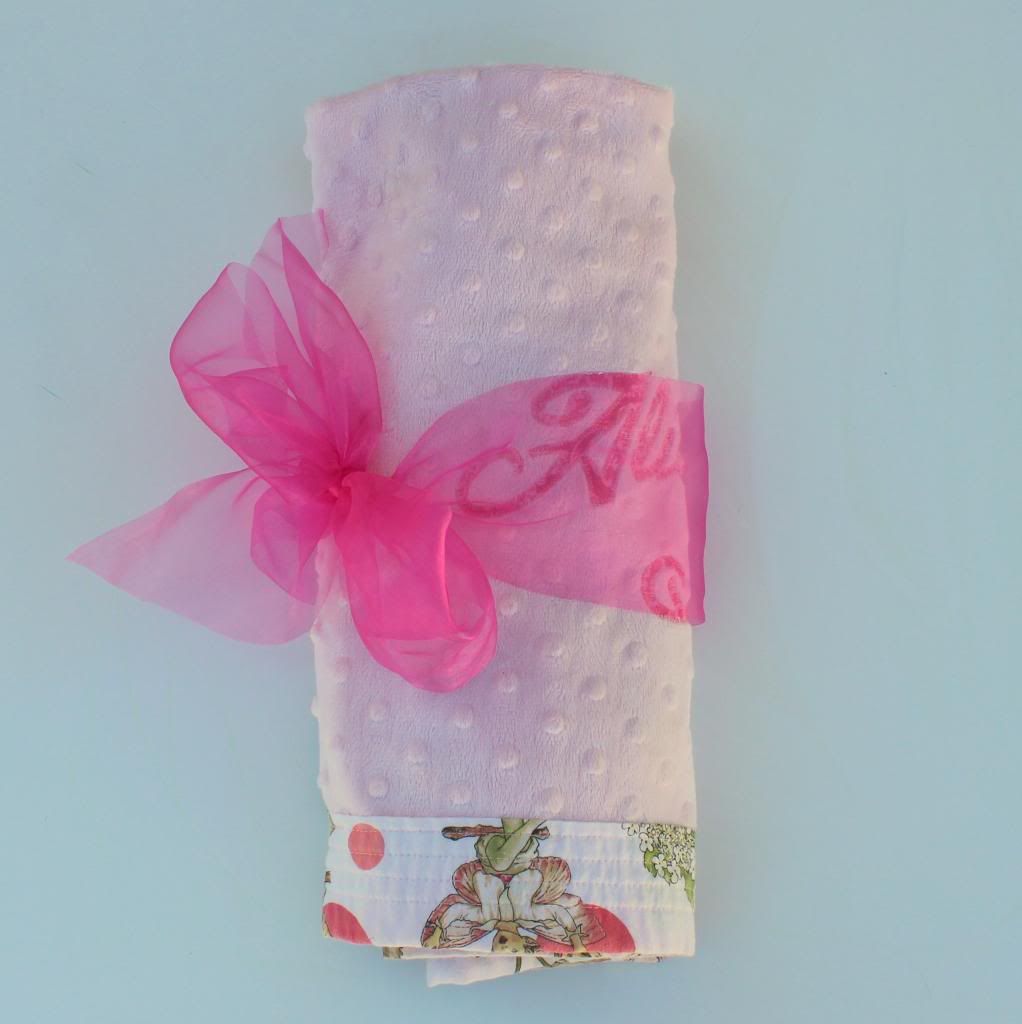
Yay we are all done! Fold it up nice and tie it up with some ribbon and the new mummy will love it!

self bound baby blanket


baby blanket tutorial


I hope you enjoyed my first tutorial

Now don't be shy please feel free to comment with your feedback or link your own versions of the baby blanket I would love to see them and I love comments!


Dani xo

Monday 5 November 2012

Grand plans

I have a (not so secret) little secret to share with my first post, out little family of three is about to become a family of four! After a horrendous summer** two years ago being heavily pregnant, I swore  never ever to do it again over the heat of a Perth summer but funnily enough here I am heading into yet another summer with a bub arriving in Feburary.

Something else I swore I would never do while pregnant was attempt to renovate. Trust me when I say the combination of a hormonal (sweaty) pregnant woman, no functioning bathroom, and a houseful of tradies (strangers) and dust spells epic meltdown and a traumatized husband. However once again I have lost my mind and have plans to undertake our biggest renovation yet.

If we can pull this one off our sweet little 1950's two bedroom one bathroom home will become a modern functional three bedroom two bath home with a home office/ sewing/spare room with a new kitchen dining and family area. Sounds great doesn't it?

Sorry for the sad effort of a before picture, unfortunately in our excitement to start beautifying our little house we forgot to take proper pictures!

I am very lucky to have a talented friend who just so happens to be a building designer and has come up with an amazing design to bring our dream home into reality - so stay tuned for some exciting updates!

xox

** just to note, the unbearable heat experienced in Perth was not just my imagination we had the longest consecutive nights over 25 degrees c on record and is now the officially hottest summer in Perth on record!

Related Posts Plugin for WordPress, Blogger...